Uncategorized

Truck loads of surprises

Hello and welcome to the blog! Shari back to share a card for the Simon Says Stamp Kids Challenge and Penguin Palace Challenge.

Truck loads of surprises

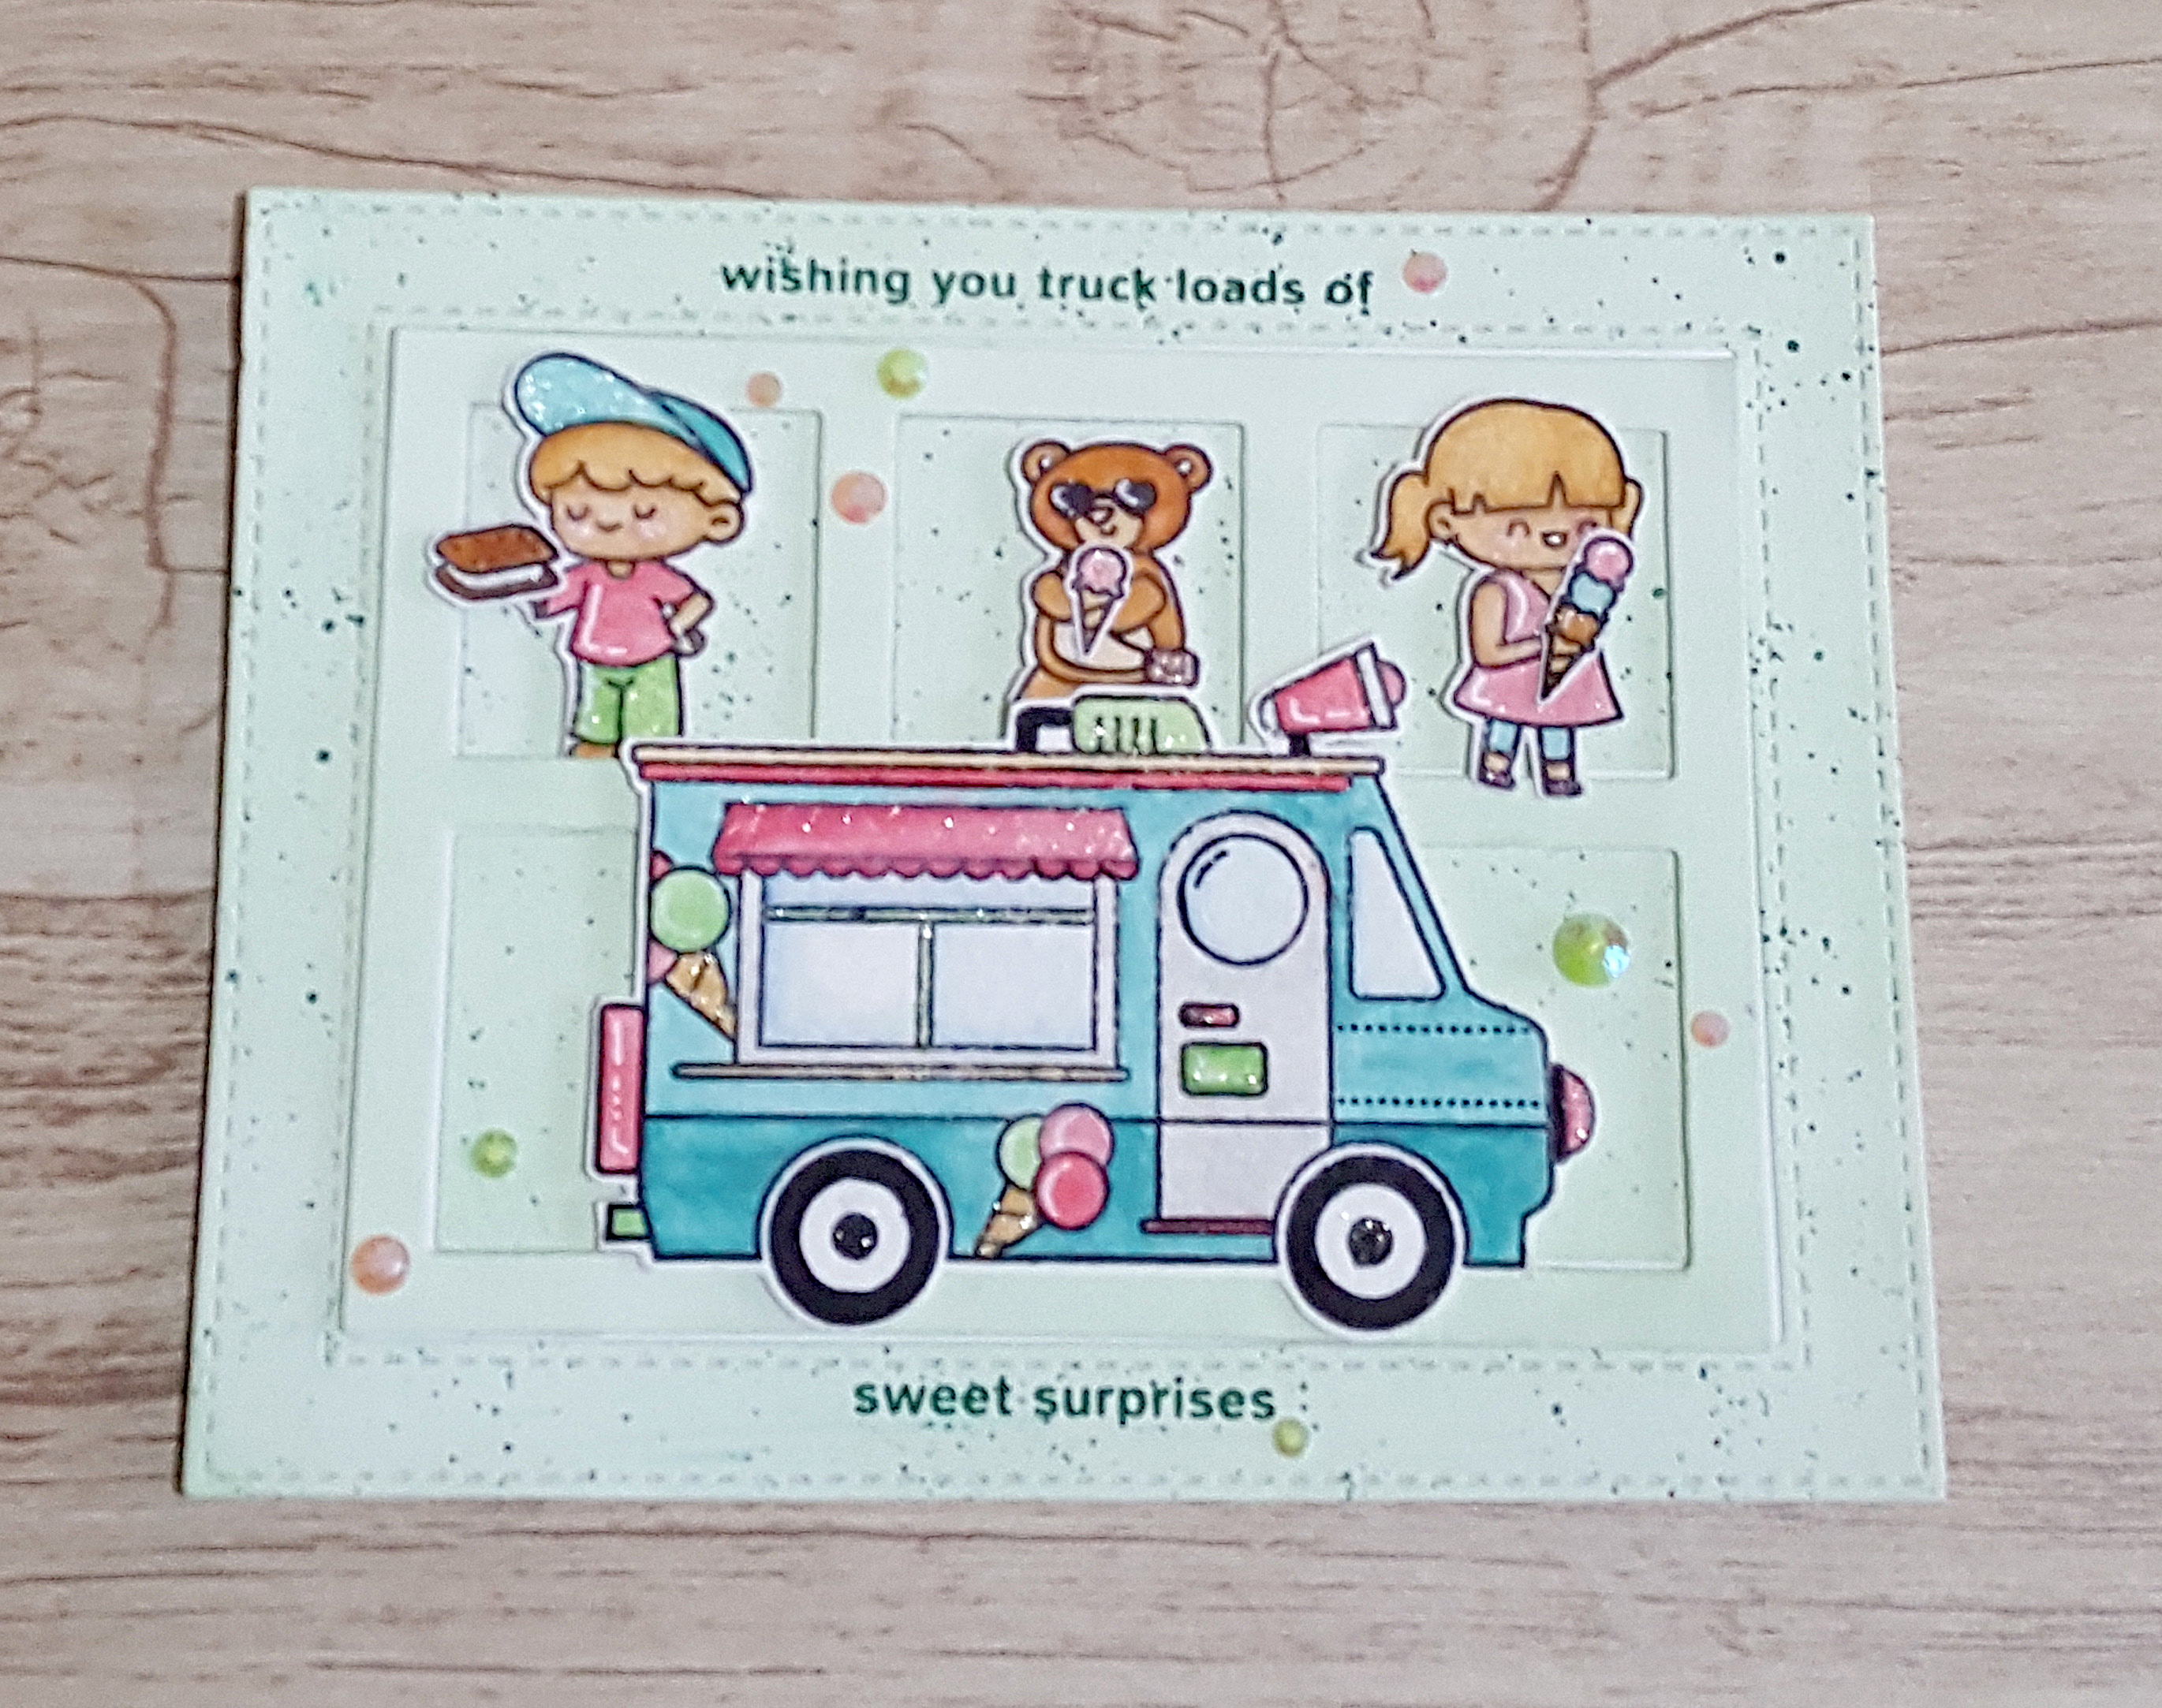
On a piece of watercolour paper I stamped some images from the Penguin Palace Sweetest Truck stamp set. I coloured them using watercolours and fussy cut them. I added white gel pen highlights and some shimmer with a stardust pen. I cut a piece of paper from my sketchbook and used a green watercolour pencil to do a light wash over the panel. Once it dried I cut it with a die.

On the outermost frame and the 4 inner panels I splattered with a dark green watercolour and let it dry. I stuck those down with liquid glue (my mum smudged some of my splatters even though you can’t see it in the picture) and the inner frame was popped up with foam tape. I stamped the sentiment from the same stamp set in Stampin’ Up Emerald Envy ink then I stuck the images with foam tape. I added some green and pink gems from Pretty Pink Posh and the card is done!

This card will be linked to:

Simon Says Stamp Kids Vacation Challenge – Anything goes with Sparkle and/or Shine

Penguin Palace Challenge 3 – Colour Palette Inspiration

Thank you for visiting!

Uncategorized

Truck Loads of Sweet Surprises

Hello! Welcome to the blog! Shari back again with another card for the Simon Says Stamp Monday and Wednesday Challenges.

truck loads of sweet surprises

For this card, I was actually inspired by the card from my last blog post, because i thought it was really cute and I’ve honestly been saying that for the last few days since I made it. My mother even said it looked like a card that people from the Lawn Fawn design team would make so I took that as a compliment.

To start of this card, I stamped all the images from the Penguin Palace (yes, again) The Sweetest Truck stamp set onto white card stock and coloured with watercolour pencils. I fussy cut the images yet again (I counted how long I took and it was 28 minutes) and added shimmer with the Sakura Gellyroll Stardust pen.

I ink smooshed on watercolour paper, this time doing both green and blue. I took a strip and painted black watercolour on it to be the road. I cut and adhered the different pieces to a piece of card stock and that finished the background. I stuck my images with liquid glue, double sided tape and foam tape, then the harshest critic of the house (my sister) told me the sky looked empty. I took a white gel pen and added clouds to the sky. I stamped the sentiment from the same stamp set with black ink (it looks blue in the picture). I took black and clear Nuvo Drops and added black to the middle of the wheels and dotted some in the sky. I used the clear in the windows of the truck, and that finished my card!

This will be entered into the:

Simon Says Stamp Monday Challenge – Layer It

Simon Says Stamp Wednesday Challenge – Happy Birthday

Thanks for visiting, see you soon!

Uncategorized

Happy Birthday from All of Us

Hello! Welcome back/to The Crafty Bubble! This is Shari with a birthday card for the Simon Says Stamp Monday And Wednesday Challenges. It’s been a while because of school and such so I hope you all are well during these times!

For this card, I used a piece of white card stock and stamped the images from the Penguin Palace The More We Get Together stamp set with black ink. I coloured them with watercolour pencils and fussy cut them because unfortunately we don’t have matching dies for this stamp. I added some shimmer with a Sakura Gellyroll Stardust pen and some white highlights.

I then ink smooshed 3 panels of watercolour paper using watercolours. Using a piece of card stock, I got the proportions to trim my different panels with. I used scissors and cut my panels kind of squiggly. I then realised i wanted a sand bank so I used a Nina Husk card stock for that. I splattered it with brown watercolour and stuck it to the bottom. After I cut the excess off, I started to place my images on the background to see where I wanted them. I originally wasn’t going to use all the images, then decided to use all anyways. I used a combination of double sided tape, liquid glue and foam tape to adhere my images. I stamped my sentiment from the MFT Animal Farm stamp then used a white gel pen to draw some bubbles on the background. And it’s done!

This card will be entered into the:

Simon Says Stamp Monday Challenge – Layer It

Simon Says Stamp Wednesday Challenge – Happy Birthday

Thanks for visiting the blog! I’ll be back soon with more cards!

Uncategorized

Thanks

Hello! Shari here. I am back after a very long break. Online school has been a bit hectic but the school term is almost over so I’m happy. I’m here with two cards for the price of 1 for the Simon Says Wednesday Challenge.

Thanks

I started with a piece of watercolour paper and used autumn coloured inks (Distress Oxides and Papertrey Inks) and ink smooshed which I think may be my favourite card-making technique since I do it all the time. I then decided to do another larger panel with the same colours.

I used a Pinkfresh die and used 3 of the circles on a piece of white cardstock. Using another piece of cardstock for my card panel, I splattered it with gold paint. I also decided to splatter the circles and then decided to paint the outside of the circle that I knew I wanted to put in the middle.

Then I remembered the other panel I did. I used an Altenew alphabet die and cut them zigzagged on the panel when i realised I could make 2 cards at once. I took another piece of white cardstock and splattered that with gold paint as well.

I stuck the smaller piece of watercolour paper on the first white panel and stuck the circles to that. I cut of the excess and adhered the letters to the top. I added some sequins from Neat & Tangled and that finished my first card.

thanks2

The second card finished quickly. I stuck the ink smooshed panel onto the cardstock. I added some clear Nuvo drops and boom! My cards are done.

2 thanks cards

These cards will be entered into the:

Simon Says Stamp Wednesday Challenge

Thank you for visiting.

Uncategorized

Three more….

Hi, I seem to like to procraftinate so here I am 4 hours before the SSS Kids Challenge ends! I have my last 3 projects, including one from my sister. So here we go!

beautiful and authentic

This is the other rainbow swinking card I did. I did the same exact think as the one in my last blog post. I built a sentiment using 4 different stamps, (you are, beautiful, & ,and authentic) and stamped them with black ink. I stamped 3 hearts around the sentiment. To finished it, I added black Nuvo drops and… you guessed it, shimmer spray! I added it to the hearts and the ‘&’ sign.

thinking of you

For my next card, I used another one of the ink smooshed panels I made (I still don’t know how). I used a wreath builder and a leaf stamp and stamped it using a dark maroon. After the first round, I decided to do another based on what my mother and sister said. It isn’t very perfect but i still think it looks good. I splattered using the same two colours as the background. I originally stamped the sentiment in the peach ink but it got too dark and looked orange so I stamped over it with the same maroon colour. I used a GellyRoll stardust pen to colour over every other leaf. I also used it to go over the sentiment. I know what you are thinking, “Shari, where is the shimmer spray?” Well, I successfully managed to made a card with no shimmer spray. Big accomplishment!

thinking of you close
Here you can see the shimmer!
sketchbook

For the last project, My sister decorated her sketchbook cover (her second one). I also decorated mine but I didn’t take a picture. She used thin washi tape to tape off the sections and spell ‘sketchbook 2’. She used different colours of Color Shift by Plaid. Since the sketchbook cover is black, it shows up differently. She used gold to paint the strip with the words. Before peeling off the tape, she used black Glitterific over everything. Then she peeled off the tape and Voilà! Mine looks almost the same except that I did squares instead of rectangles.

Theses projects will be linked into: Simon Says Stamp Kids Summer Vacation Challenge

Thanks for visiting!

Uncategorized

Inky Backgrounds

Welcome back! Shari here again back with more cards for the SSS Kids Summer Vacation Challenge!

only you

For my first card, I did some “swinking”, the ink swiping technique. The name was accidentally created by the amazing Laurel Beard. I love her videos and she is so funny and creative so when I watched her video, I knew I needed to try this idea. I used three colours of inks (one of which is shimmery) and applied them to a stamp block. I then spritzed it with water and pressed it to my card panel. I loved it so much that I did another one that I will post in a blog post tomorrow (if I don’t pro’craft’inate haha I’m hilarious). I stamped a rose image in two opposite corners of my card panel. I added a sentiment and a heart image from the same stamp as the rose. I used shimmer spray (it makes yet another appearance) to the roses and some Nuvo drops to the top of the heart, the middle of the flowers and around the sentiment and that’s my first card done!

rainbow butterflies

For this card, I did yet another rainbow theme. I stamped and clear embossed six butterflies (for six colours) and used Distress Oxide re-inkers (I mixed two because we didn’t have a full rainbow) to paint over. I did a wet and wet technique to colour them. I dried it with a heat tool because I’m impatient and stamped the sentiment and clear embossed as well. I added a sparkle pen inside some places in the butterfly. Then I used some jewels from Kat Scrappiness and clear drops from Studio Katia (both of which my mother was very reluctant to give me -_- ) all around the card and that finished my second card.

rainbow butterfly close
love you

While making swinking cards, I had ended up ink smooshing somehow (I literally can’t remember how) and I made two cards with the ink smooshed panels I had (one of which will be in my blog post tomorrow). I used a heart die and cut it out of white cardstock. I swinked it using the same technique. I added shimmer spray (yet again) to the heart. I splattered it and one of my ink smooshed panels with black paint. With a black pen, I added stitching around the heart. I stamped the sentiment and a heart. Using the same black pen I added two smaller hearts around the sentiment. I stuck the heart to the panel and added Nuvo drops floating up from the heart like bubbles. I also added the Nuvo dropsto the biggest heart. And that completed my third and final card for today!

These cards will be entered into the: Simon Says Stamp Kids Summer Vacation Challenge

Thanks for visiting!

Uncategorized

Lots of Rainbows!

Hello! Welcome back to another blog post from me. Today I have three more cards for the Simon Says Stamp Kids Challenge.

rainbow fairy

For my first card, I made a 4″ square card. I stamped a small fairy and from her feet drew two lines. I used a rainbow of inks, smooshed them on a surface and coloured my fairy and the rainbow with them. I didn’t like how that looked so i coloured over it with coloured pencils. Then used shimmer spray and coloured over the rainbow and the fairy’s wings, dress and hair. I then took a stardust GellyRoll pen and added small dots all over the panel. I stamped the sentiment in black ink and adde rainbow sequins to add even more shine like it didn’t already have enough. All the shine is hard to see but i promise it’s there.

rainbow strips

My mother made a bunch of card bases and put them on some cards she had to give away. There was a lot of strips on the ground when she finished and I happened to be watching a Laura Bassen video and she said “Strip it up” and I had a Eureka moment. I picked up most of the strips and decided to ink smoosh them. This was a bit difficult but I got to the end. I started sticking from the middle and continued downwards until I covered the rest. I added some shimmer spray (this is becoming my new favourite product) to alternating strips. I made a gigantic mistake so I covered it with card stock. I stamped a sentiment and added black Nuvo drops. And my second card is done!

Rainbow foil dots

For my final card, I used a lot of foil. I used a glue pen and added rainbow colours of foil. I did it one colour at a time so I wouldn’t mess it up too much. I white heat embossed my sentiment and foiled two small “L” shaped in gold foil. I adhered it using foam squares and I was done.

These cards will be entered into the: Simon Says Stamp Kids Summer Vacation Challenge

Thanks for visiting!

Uncategorized

Look Up to You

Hello, it’s been a while!

look up

For this card, I started with a card panel and ink smooshed with multiple shades of purple inks. I also ink smooshed some shimmer spray onto the panel. I cut squares that are 1 ⅝” out of purple card stock. I embossed cats and accessories with white powder and used a Gelly Roll Stardust pen and some silver glitter glue to and accents to certain places on my mini scenes. On my panel i stamped from the same set and the images on my mini scenes. I adhered my mini scenes to the left of my ink smooshed panel and added sequins to finish it off.

Kids Summer Vacation Challenge

Goodbye!

Challenges

Marching Band

Heyo everyone! Shari again sharing a card not using MFT stamps but stencils!(I need to stop.)

Marching Band

Per usual, I stamped the images, coloured them and fussy cut them rather poorly. On a piece of cardstock using two *cough MFT cough* stencils I made a sky and grass scene for my critters. I chose this specific stamp because of the sentiment that literally says the theme!
So I stamped part on the turtle’s banner and the rest on the sky. I stuck my images on the card and took Nuvo drops and the stardust pen and added shimmer to various parts of my card and I’m done..

This will be entered to:

Simon Says Stamp Monday Challenge – Party Time

Simon Says Stamp Wednesday Challenge – Party Time

Thanks for coming!

Challenges

Celebration Wishes

Welcome back to the Crafty Bubble! Shari here once again with another card using MFT products because I just can’t seem to stop…

Celebration Wishes

I began by stamping and colouring my images, then fussy cutting them. I took a piece of yellow card stock and used a party streamer stamp and used a WOW! embossing ink pad to make a subtle background. After adhering my images to the card stock and stamping the sentiment, I thought the top looked rather empty so I stamped a banner on the top and coloured it in rainbow to match the penguin’s banner. Using a Gellyroll stardust pen I added a boatload of shimmer on some parts of the images and banners. Boom!

This card will be entered to:

Simon Says Stamp Monday Challenge – Party Time

Simon Says Stamp Wednesday Challenge – Party Time

Thanks for visiting!